74 Reviews

Snow Melting Systems


Our snow melting systems work by incorporating embedded heating elements into an outdoor surface to not only melt any accumulating snow and ice but the system can also be ran after the snow stops to help evaporate the leftover water. A snow melting system not only makes your life much easier in the wintertime, it also helps protect you and your loved ones. And while that peace of mind is certainly priceless, you'll be pleasantly surprised to learn just how affordable our snow melting systems actually are! With our snow melting systems, you can stay warm and cozy inside while the system does all of the work. Learn how snow melting systems can work for driveways, patios, walkways and paths, accessibility ramps, or even stairs.


Operating Cost Calculator

noun_floor plan_2158348
Project Showcase

Installation Planning Guide
Get an Instant Quote

Compare product solutions, controls, and costs for your project instantly!


sq. ft.

Heating Solutions for Asphalt, Concrete & Pavers

We offer a selection of snow melting systems that heat driveways, patios, walkways, or stairs and can be installed in asphalt, concrete, or under pavers in mortar. Our snow melting systems are available in two formats: mat and cable. The mats are designed to deliver 50 watts of heat per square foot and allow for quick and easy installation. The cable system allows for maximum flexibility and generates 12 watts per linear foot. Our systems are available with a selection of different controls, each with different specifications to sense things like air temperature or moisture on the pavement.

15% Off
Snow Melting Mat Heating System Banner

Cut-and-Turn Format for Easy Installation


  • 10 Year Warranty
  • As low as C$14 per sq. ft.
  • Up to 38.5 or 50 watts per sq. ft. (depending on cable spacing)
  • Available in 120/240 VAC
15% Off
Snow Melting Cable Heating System Banner

Maximum Flexibility at a Minimal Cost


  • 10 Year Warranty
  • As low as C$11 per sq. ft.
  • Up to 50 Watts per sq. ft.
  • Available in 120 VAC, 208 VAC, 240 VAC, 277 VAC

Consult with a Snow Melting Expert Do you need to discuss your snow melting project with our experts? fill in the form below and we will respond within 1 business day. Provide us your project details for a free no-obligation quote.


Snow Melting System Control Options

Once you've decided what type of heating system, you'll need to choose a control for your snow melting system. WarmlyYours offer a selection of controls, ranging from a basic manual control to our premium option that provides the ultimate in convenience and hands-off operation. We even offer an affordable and user-friendly WiFi control that can be configured so that the heating system can be controlled remotely or can be energized based on real-time weather events.

Shop Controls

Snow Melting System Design Guides

Our snow melting systems can be used to keep nearly any outdoor surface clear of snow and ice. From heated driveways to outdoor patios, WarmlyYours has spent many years helping heat a huge variety of projects. Check out some of our Snow Melting Design Guides with great install photos, product pricing information, and much more.


Why Install Snow Melting?

  • No More Shoveling Finally put away the rock-salt and shovels and start enjoying winter again.
  • No Harmful Chemicals Do away with chemical melting agents, which will be easier on your pets and your vehicles.
  • Peace of Mind Melts the ice and snow, providing a safe passageway for you and your family, as well as guests to your home.
  • Easy to Install No pipes, boilers, tubing, tanks or noisy pumps to install.
  • Affordable Most systems are inexpensive to run and require no regular maintenance.
  • Safe CSA certified for outdoor use in the US and Canada.

Why Choose WarmlyYours?

WarmlyYours provides free design services to make sure that customers purchase the heating system that best meets their project requirements.

  • Free Installation Plan We provide a free, no-obligation SmartPlan™ with every quote, often within 1 day.
  • 24/7 Installation Support We're here to answer your questions every day – year round – round the clock.
  • Fast Shipping & Simple Returns With same day shipping nationwide, we're committed to getting your order to you on time. Plus, we don't charge restocking fees for unused products.
  • Unbeatable Warranty Our snow melting heating elements are covered by a 10-year limited warranty against defects in material or workmanship.

Eco-Friendly Benefits of Snow Melting Systems

Electric snow melting systems are considered an eco-friendly snow melt alternative to other forms of snow removal, particularly chemical agents, for several reasons:

Reduced Use of Chemicals

Elimination of Deicing Chemicals: Traditional snow removal often involves the use of salt and chemical deicers, which can harm the environment and even our beloved pets. These substances can contaminate soil and water sources, negatively impacting plants, animals, and aquatic ecosystems.

Energy Efficiency

Targeted Heating: With the use of zoning controls, like our ZoneBraker, snow melting systems can be be broken up into zones that can be energized independently, ensuring that only necessary areas are heated, reducing overall energy consumption.

Longevity and Durability

Reduced Wear and Tear: These eco-friendly snow melt systems can reduce the mechanical wear on your outdoor surfaces, like your driveway, caused by snow plows and other heavy equipment, leading to longer-lasting surfaces and less frequent need for repairs and replacements.

Overall, electric snow melting systems offer a more sustainable and environmentally friendly alternative to traditional snow removal methods, contributing to better ecological health and reduced environmental impact.


Frequently Asked Questions

That depends on a number of variables (like the temperature outside) but generally speaking these snow melting systems are designed to melt 1" - 3" of snow per hour. Anything above 3" per hour is typically considered blizzard conditions. 

22 people found this helpful.  Did you find this helpful? Yes No

Never cut the heating cable. A heating cable will not work if it has been cut. If the heating cable is too long, call WarmlyYours to consult with a technician who will guide you in utilizing the additional length of cable.

17 people found this helpful.  Did you find this helpful? Yes No

The material costs are similar. However, electric systems are easier to install, with fewer components and significantly lower maintenance costs. Electric systems will run for a shorter period of time to give the same level of performance but with much higher energy efficiency (typically 95%-98% efficient). Controls and sensors required for the two types of systems are very similar. Electric systems do not usually require slab insulation and do not create the concerns typically associated with hydronic systems. These concerns include, but are not limited to, return temperatures, flue gas venting, waterway shrinkage and property damage caused by leaking pipes or tubes.

14 people found this helpful.  Did you find this helpful? Yes No

When installing outdoor WarmlyYours snow melting cables for your driveway, patio, walkway, terrace, stairs, ramp, etc. - NEVER cross, overlap, or allow the heating cables to touch each other. Doing so will quickly cause a circuit failure due to excessive heat build up. Always follow the installation instructions and/or design layout plan to ensure the cable is installed with the correct spacing required for proper operation.

14 people found this helpful.  Did you find this helpful? Yes No

Yes. The manufacturer's splice that connects the heating element to the cold lead should be entirely embedded in a noncombustible material (like asphalt, concrete, or mortar) within the outdoor surface that is being heated. 

12 people found this helpful.  Did you find this helpful? Yes No

We suggest using cable to heat stairs as it is easier to route between the separate stairs. 

11 people found this helpful.  Did you find this helpful? Yes No

Our systems can handle low temperatures, but many controls come equipped with a Low-Temperature Lockout Feature. This feature prevents the system from running in very low temperatures. At very low temperatures it can become difficult for the system to effectively melt the snow. It is however possible to turn off this feature should you need the system to keep running during such low temperatures.

11 people found this helpful.  Did you find this helpful? Yes No

Electric-resistance heating cables and systems have no polarity. This includes all current WarmlyYours heating elements.

9 people found this helpful.  Did you find this helpful? Yes No

The electrician may shorten the cold lead wires during the installation. Any cold lead wire extensions/splices must be made in a junction box in accordance with the installation instructions, and must comply with all national and local electrical codes.

Never cut the heating cable.

8 people found this helpful.  Did you find this helpful? Yes No

This National Electric Code (NEC) required protection for fixed outdoor deicing and snow-melting equipment may be accomplished by using circuit breakers equipped with ground-fault equipment protection (GFEP) of 30 mA. It is important to understand that this required equipment protection is not the same as a 5 mA GFCI used for personal protection.

8 people found this helpful.  Did you find this helpful? Yes No

Power requirements are measured in Amps and based on three factors: the watts per sq. ft. of the snow melting cable or mat, the area powered and the voltage used for the application. Our product is rated at 50 watts per sq. ft., so that is a constant factor. Most snowmelt projects are powered with 240V AC – not all, but most. The one factor that is always variable is the area to be heated/powered. That is based on your project. For a point of reference, let’s use the example above of a 350 sq. ft. concrete patio.

The formula is (50 W/sq. ft. x area of 350 sq. ft.) / V (240V) = Amps, so 17,500 / 240V = 72.9 Amps

7 people found this helpful.  Did you find this helpful? Yes No

All of our automatic controllers have a Hold-on time feature after the initial warming up of the snow melt system. This feature ensures that all the snow is melted from the surface, and also that the system continues to operate and evaporate the surface water without it refreezing.

7 people found this helpful.  Did you find this helpful? Yes No

Pavers can be removed and reinstalled for a retrofit application of our snow melt system. Tire tracks are not typically recommended for paver surfaces, so any retrofit application would most likely need to be full coverage. In this case, it should be treated like a brand new installation, just with existing pavers.

5 people found this helpful.  Did you find this helpful? Yes No

To ensure optimal performance, snow melting heating elements should be installed so that they are consistently 2"-3" from the finished surface. For installations using pavers, the maximum thickness for pavers installed over heating elements is 2.5". 

5 people found this helpful.  Did you find this helpful? Yes No

The heating elements for a snow melting system typically will start at $9 ($11 CAD) per sq. ft. for Snow Melting Cables and $11 ($14 CAD) per sq. ft. for Snow Melting Mats. However, you'll also want to keep in mind the cost of a control, and if required, sensor/s for your snow melting system, which will add to the cost. Use our free Quote Builder to get an idea of how much a system would cost for your project. 

5 people found this helpful.  Did you find this helpful? Yes No

Each zone may be activated for any length of time. No two applications are the same. You can start with 10 minutes and adjust up to 120 minutes per zone, and through trial and error, find the optimum zone durations for the best operation of your system.

4 people found this helpful.  Did you find this helpful? Yes No

This type of installation should not significantly affect the longevity of the driveway. Be sure to have a professional for your surface material type evaluate this during installation.

4 people found this helpful.  Did you find this helpful? Yes No

When the design requirement's amp draw exceeds the selected controller's capacity.

3 people found this helpful.  Did you find this helpful? Yes No

Yes, you can retrofit a snow melting system into a preexisting driveway made of concrete or asphalt. You can do this by using an appropriate tool to cut properly spaced lines (or trenches for tire tracks heating) in the surface. Then you can place the the heating elements in the lines (or trenches) before sealing them with either hot asphaltic sealer for asphalt retrofits, or backer rod and expansion joint sealer (SikaFlex or similar) for concrete retrofits. Of course, you'll want to make sure this step is done in accordance with the filler manufacturer’s recommended procedures. Check out our snow melting retrofit guide for more information about this process. 

3 people found this helpful.  Did you find this helpful? Yes No

If a cable is damaged during installation, recheck the system for continuity and confirm the integrity of the insulation with a megohmmeter, or "megger" tester, referring to the installation and testing instructions. If the cable fails any of these tests, take the following actions: clear a 3 foot square working area around the damaged section of cable, and record the cable part number from the UL tag and the location where you purchased the product. Call WarmlyYours with the above information. WarmlyYours will provide further assistance and supply a splice kit suitable for repairing the particular cable.

3 people found this helpful.  Did you find this helpful? Yes No

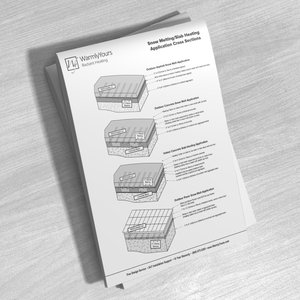
Yes, as long as the paver isn't resting on exposed cable. The cable has to be embedded according to the installation cross section drawing.

Cover to an uncompacted depth of 1.5” (38mm), leveled to grade. A compactor that's applicable to the thickness and application can be used to compact the sand. The paver installer(s) must take care not to walk on the hot-cold factory splice and to avoid damaging the Heating Cables with shovels or rakes. At no time shall the compactor directly contact the wire.

2 people found this helpful.  Did you find this helpful? Yes No

Pavement Snow and Ice Sensor Kit (SIT–6E Sensor + Housing) and Snow Melt Aerial Sensor (AIR-SS-2).

2 people found this helpful.  Did you find this helpful? Yes No

Most outdoor systems will require an additional or sub panel to handle the amperage of the snowmelt system.

2 people found this helpful.  Did you find this helpful? Yes No

The most common spacing for snow melting systems is 3“ from wire to wire. However, we can design snow melting systems based on your local climate and weather expectations that might have different cable spacings to ensure the most efficient system possible. We also offer snow melting mats with 3" and 4" spacing.

2 people found this helpful.  Did you find this helpful? Yes No

In an area free of obstruction and able to detect rain or snow, yet low enough so that it is easily accessible if service is needed. Atop a fence post or on an 'L' bracket on the side of a building are common.

2 people found this helpful.  Did you find this helpful? Yes No

If the app has scheduled turning on/off the towel warmer, it will override the manual setting.

2 people found this helpful.  Did you find this helpful? Yes No

To calculate the system's approximate operating costs, multiply the total kilowatts of the system by the cost per kilowatt in your area. Let's use the example of a 350 sq. ft. of concrete patio (residential application), with 240 VAC.

Total Watts: multiply area in sq. ft. x 50 Watts
350 x 50 = 17,500 Total Watts

Kilowatts: (the unit in we purchase electricity) take the Total Watts and divide by 1000
17,500 Total Watts / 1000 = 17.5 Kilowatts.

Kilowatt Rate: use the national average of .12 cents per Kilowatt-hours so how much do we pay for 17.5 kWatts?
17.5 kW x .10 = $1.75 for every full hour of operation.

Hours of Operation: We use a typical 6 hour snowfall for our example.
$1.75 x 6 hours = $10.50 for that snowfall.

All of this will vary due to "after-run time". "After run time" is where the system remains on extra hours after the snow has completed falling, to ensure complete pavement snow melting and drying.

2 people found this helpful.  Did you find this helpful? Yes No

Small In-Ground Snow Melting Junction Box can accommodate 1 or 2 cold leads, while a Large In-Ground Box can accommodate between 3 to 8 cold leads. A large Wall-Mounted Junction Box can accommodate up to 8 cold leads.

1 person found this helpful.  Did you find this helpful? Yes No

120, 208, 240, 277 voltages.

1 person found this helpful.  Did you find this helpful? Yes No

No, you may vary the times for each zone as necessary.

1 person found this helpful.  Did you find this helpful? Yes No

Minimum is 1.5“ and Maximum is 2.5“

1 person found this helpful.  Did you find this helpful? Yes No

The snow melting system is not operated by a thermostat, it is operated by either an automatic or manual controller.  A snow melting controller does not maintain temperatures like an indoor thermostat does.  An automatic snow melting controller only turns the snow melting system on when it detects precipitation and the temperature outdoors is below the set temp (typically 37.4°F / 3°C).

1 person found this helpful.  Did you find this helpful? Yes No

Yes, WarmlyYours Snow Melting Heating System can be installed with quartzite stones. Start with 4” to 8” (102mm to 203mm) of crushed rock aggregate base. Rebar or wire mesh should be staked on top of this base and then heating cables or mats will be tied to this mesh with plastic zip ties. Heating system needs to be covered with 1” to 1.5” (51mm to 76mm) of finished mortar or sand. Stone Pavers will be installed on top but must NOT be any thicker than 2.5” (63.5mm). See cross-section in the documents section and in the manual.

1 person found this helpful.  Did you find this helpful? Yes No

The snowmelt cables/mats can withstand direct contact with asphalt temperatures of up to 464°F (240°C).

1 person found this helpful.  Did you find this helpful? Yes No

A properly designed and installed system will handle most snow melting demands. Some snow events may have a very rapid snow fall rate, and some may not. No 2 events are ever exactly the same. Our system typically can melt 1“-2“ of snow per hour, on average. However, it is important to understand that a system may not melt snow at very cold temperatures. This is simply because the system cannot generate enough BTUs to overcome the heat loss generated by very low temperatures.
In order to estimate cost of operation, the Warmly Yours Electric Snow Melting Operating Cost Calculator is a useful tool that can help illustrate what it would cost to operate the system.

1 person found this helpful.  Did you find this helpful? Yes No

Yes, the leads are not direct burial rated. The leads must be protected in compliance with local electrical codes.

1 person found this helpful.  Did you find this helpful? Yes No

Any outdoor rated plastic, watertight junction box will be acceptable.

1 person found this helpful.  Did you find this helpful? Yes No

No. Each snow melt mat comes with a 20‘ cold lead.

1 person found this helpful.  Did you find this helpful? Yes No

If the “SNOW SENSOR OVERRIDE” button is pressed, the system will run for the set amount of time which was programmed in to the user defined “AFTER RUN” field.  To cancel the “SNOW SENSOR OVERRIDE” you must turn the system “OFF”.

Page 4 of https://www.warmlyyours.com/en-US/publications/ZONEBRAKER-TOUCHSCREEN-MULTI-ZONE-SNOW-MELTING-CONTROLLER-MANUAL-A.pdf

1 person found this helpful.  Did you find this helpful? Yes No

No, additional wiring is supplied by the electrician.

1 person found this helpful.  Did you find this helpful? Yes No

Yes.  Information on how to install under permeable pavers can be found in section 4.6 of the Installation Manual

.  Excavate 18” and fill with #2 aggregate/stone.
.  4” of #57 stone
.  2” of #9 stone to serve as the paver setting bed.
.  The heating cable is installed within the #9 stone layer.

To maximize the amount of heat transferred from the heating cable to the pavers, the stone separating the cable and pavers needs as much contact with both as possible. Crushed stone with fines transfers the most heat, but doesn’t drain, so it isn’t used in a permeable installation. Instead, smaller drainage stone (#9) is used because it has more contact with the cable and transfers more heat than larger stone.
Note: do not install the cable at the top so it’s touching the pavers. Potential movement by the pavers over time could wear through the protective coating of the cable and short out the entire installation.

1 person found this helpful.  Did you find this helpful? Yes No

Once you've decided what type of heating system (manual vs. automatic), you'll need to choose a control, which may or may not utilize a sensor. You may need a relay panel(s) depending on the size of the system, and a snow melt plaque which is required by the National Electric Code. Junction box(es) may be optional depending on the distance of heating cable from the indoor power location.

1 person found this helpful.  Did you find this helpful? Yes No

The electrician must route the cold lead(s) through rigid metal conduit(s) or other approved means, to get back to an accessible weatherproof junction box(s). Care must be taken by the electrician so that none of the heated section of Cable enters the conduit(s).

1 person found this helpful.  Did you find this helpful? Yes No

No, cold leads need to run protected in approved conduit into a junction box. In the junction box they may be attached to wires carrying voltage from the main circuit.

1 person found this helpful.  Did you find this helpful? Yes No

Each heating cable comes with a factory installed cold lead wire that must be routed through the rigid metal 3/4" conduit to a outdoor rated junction box where a simple wire nut connection can be made for the electrical hook-up.

1 person found this helpful.  Did you find this helpful? Yes No

Always confirm the power requirements with the electrician. Large snow melting systems usually require a new electrical panel or electrical service. Contact WarmlyYours for a quotation, indicating the actual power capacity available, and to obtain recommendations for reducing the power consumption. For example, opting for tire track coverage rather than installing the snow melting system over the entire driveway can dramatically reduce power requirements.

1 person found this helpful.  Did you find this helpful? Yes No

The layer of noncombustible material needed below snow melting heating elements must be at least 2" deep. 

1 person found this helpful.  Did you find this helpful? Yes No

Yes, but the cables will have a slightly reduced heat output. The wattage will be 13% lower, so that means instead of 50 Watts per Sq. Ft., the system will provide around 43.5 Watts per Sq. Ft. That is why WarmlyYours now stocks 208V cables."

1 person found this helpful.  Did you find this helpful? Yes No

Yes. When more than one sensor is used, any positive activation by either of the sensors will activate the controller.

For example, the AIR-SS-2 aerial sensor and the SC-SS-PAV-6E-KIT slab sensor can be connected simultaneously for increased reliability.

1 person found this helpful.  Did you find this helpful? Yes No

Test the Snow Melt cable or mat using a digital ohm meter as shown here.  Also test the snow melt cable or mat using a Mega Ohm meter as shown here.  And this video shows how to do the Ohm test.

Did you find this helpful? Yes No

A 2 pole single-phase 240V circuit works by continuously monitoring the current flowing through both hot wires of the circuit. If it detects even a slight imbalance between the current on each hot wire (indicating a ground fault), it will quickly trip, cutting off power to the circuit. Essentially, it compares each leg of the 240V circuit and trips if they are not precisely equal.

Did you find this helpful? Yes No

No. multiple sensors can be used, but when they activate, the entire installation activates and the control will start controlling the entire installation (all zones attached to the control).

Did you find this helpful? Yes No

No, the RCO can only be used with the SCA-DUAL or the SCP-120 snow-melting controllers.

Did you find this helpful? Yes No

This feature prevents the snow melting system from running, by default, in temperatures below 17°F (–8.33°C), or as set by the user. At temperatures this low, it becomes difficult for the system to effectively melt the snow. It is, however, possible to turn off this feature should the system be required to keep running during these low temperatures.

Did you find this helpful? Yes No

The best time to install an asphalt driveway is generally from spring to fall. The contractor has more time to work with asphalt at warmer temperatures of 50°F / 10°C and above. The warmer the better. The contractor has less time to work with asphalt at colder temperatures and lesser depths. For example, at 40°F / 4°C, a contractor has only 25 minutes to work with a 2" thick asphalt installation.

Did you find this helpful? Yes No

The correct bedding material should be washed concrete sand meeting ASTM C33 gradation.   

Please review this WarmlyYours Snow-Melting cross-section for proper installation.

Did you find this helpful? Yes No

The relay panel is not rated for outdoors.  It can be put in a NEMA 4 box outdoors to meet this requirement.

Did you find this helpful? Yes No

It can go outdoors provided weatherproof fittings are used.  The optional RCO switch should be considered for remote operation from an indoor location.

Did you find this helpful? Yes No

Yes. The NEC requires 2“ minimum of non-combustible material below, and 1.5“ minimum of non-combustible material above the heating cable.

The drawback is whether or not the pervious concrete will fail under load, thereby damaging the heating cable and voiding warranty. The cable should be attached to rebar in this case to insure the strongest support.

Did you find this helpful? Yes No

The US National Electrical Code prohibits electric heating cables in pool decks. Please check with your local Authority Having Jurisdiction to see if your local code allows this, as local code overrides the national code.

Did you find this helpful? Yes No

Ensure that all the zones have a time value set for run-time operation. If a time value is not set for a particular zone, it will not activate.

Did you find this helpful? Yes No

Ground fault equipment protection (GFEP) is intended to provide protection for equipment against damaging line-to-ground currents by disconnecting all ungrounded conductors of the faulted circuit.

Did you find this helpful? Yes No

One option is saw cutting the grooves into the existing concrete for cable placement and filling the remaining grooves with a sealant. This depends on the preferred finished surface, an alternative option may be to install the cable or mat over an existing surface, overlay in mortar and then have brick, stone or tile installed on top. When working over an existing concrete surface, ensure that the heating cable never crosses the existing expansion joints.

Did you find this helpful? Yes No

This control is capable of controlling up to 4 separate zones.

Did you find this helpful? Yes No

It depends on how the system is intended to operate. If the expectation is manual operation (ex. WiFi or Timer Control), then no sensors are required. If the expectation is automatic operation, then the system will require at least one snow sensor.

Did you find this helpful? Yes No

This control does not incorporate a built in GFEP protection. GFEP protection must be supplied by GFEP breakers.

Did you find this helpful? Yes No

When heating stairs, we recommend minimizing or eliminating overhangs/lips on stair surfaces. It is very difficult for the heat to reach these protrusions, as heat only transfers, at most, 2" to 3” laterally from the cable. This is why we recommend placing a run of the heating cable right at the front edge of the stair, which will help keep this area clear of snow or frost as much as possible. The riser of the stair is not heated--only one run of cable goes down the riser to reach from an upper stair to a lower stair.

Did you find this helpful? Yes No

The "Max Slab Temp" sensor value should be set to 50 degrees F, and adjusted as necessary to optimize operation.

Did you find this helpful? Yes No

No, a sensor is not required with the snow melt system. However, certain automatic controllers require a temperature/moisture sensor to sense atmospheric conditions and may also require an in-slab, high temperature limit sensor to be installed (notably, asphalt installations).

Did you find this helpful? Yes No

If the WiFi switch is not functioning to the My Leviton app's schedule or settings, it is recommended to either update the firmware of the WiFi switch from the Leviton app or, reset the WiFi switch by turning it on/off at the circuit breaker controlling the switch.

Did you find this helpful? Yes No

We recommend that the layer of landscaping rock be no deeper than 2.5". If the snow melting heating elements are embedded any deeper than that, then the system may not yield satisfactory results.

Did you find this helpful? Yes No

No, chicken wire is too flimsy. A rigid framework without sharp edges, such as rebar or wire mesh, needs to be used to ensure that the embedded heating system is the proper distance from the finished surface. We recommend that the heating system is secured to the rigid framework with plastic zip-ties. 

Did you find this helpful? Yes No

The system may be shut off by pressing the OFF/CONFIG tab on the screen.

Did you find this helpful? Yes No


Snow Melting Customer Reviews

Rated 4.9/5 based on 74 reviews

We take pride in providing both exceptional service and great products. But don't just take our word for it, check out what some of our customers have had to say.

Excellent quality product.

Snow Melt Mats


Excellent quality product. Installed for patio door threshold last summer. Used it a couple times last winter to make sure it worked, it did. I still shovel the stoop and the rest of the concrete, need the exercise anyway. But the heater is there if needed.

Km in Glenwood Springs, CO

Great, easy to use product

Snow Melt Mats


The mat was an easy install under pavers. The walkway was on North side of home and doesn't see much sun during the winter and was tough to keep clear without excessive salt. We set the walkway on a timer which works excellent when we need it. Thank you for a great, easy to use product!

Todd B. in Auburn, ME

Great product. Easy to Install. Customer Service is Awesome!

Snow Melt Cables


Great product. It is easy to install and works great. The customer service as awesome and delivery was faster than ordering from a local dept store. I will buy more when the cabin is ready for flooring.

Tsk in Edmonton, ALBERTA

Snow Melting Cable is DIY Friendly and Easy to Install

Snow Melt Cables


As a DIY, I really appreciated the snow melting cable because it is so heavily jacketted I had no trouble with damage, testing the cable before and after proved that it withstood whatever it had to during installation. I love that it has a built-in return connection; meaning the cable doesn't have to make the "run" back to the relay panel - this made the install so much easier.

Rocco in Woodbridge, ONTARIO

More Customer Reviews