

Installing a mirror defogger can significantly enhance your bathroom experience by ensuring a clear reflection, even after the steamiest showers. While the process is straightforward, following professional tips can help you achieve optimal results. Here’s a comprehensive guide to assist you:
How to Install a Mirror Defogger
Installing a mirror defogger is a straightforward project that can make a big impact on your daily comfort. Most defoggers, like the ClearlyYou™ Mirror Defogger from WarmlyYours, come with a self-adhesive backing and are designed for easy retrofit behind an existing wall-hung mirror.
Choose the Appropriate Defogger Size and Shape
• Measure Your Mirror: Accurately measure the height and width of your mirror. Select a defogger slightly smaller than the mirror to ensure it remains concealed when mounted.
• Consider Mirror Shape: Defoggers come in various shapes—rectangular, circular, and oval. Choose one that closely matches your mirror’s shape for uniform heating.
Determine the Placement
• Choose a location for the defogger that benefits all users. For larger mirrors, position the top edge approximately 6’6” above the floor. For smaller mirrors, center the defogger over the vanity area.
• Mark the wall to indicate the mirror’s position and the location where the defogger’s lead wires will connect to the electrical box.
Safety Precautions
- Ensure all wiring complies with the National Electrical Code (NEC) and is performed by a licensed professional.
- Turn off the electrical circuit breaker at the main panel before beginning installation.
- Do not install the defogger inside a shower, sauna, or steam room.
- Inspect the defogger for any damage before installation; do not install if damaged.
- Do not overlap multiple defoggers on a single mirror.
- Never cut or resize the defogger.
Read the Manual!
Installing a mirror defogger is a straightforward project—but like any electrical product, it’s important to follow the proper steps to ensure safe and effective performance. Before you begin, take a few minutes to review the official WarmlyYours installation manual. It includes everything you need to know, from wiring recommendations to surface prep tips.
👉 View the Installation Manual (PDF)
Prepare the Electrical Wiring
-
Install a 2” x 3” Remodeler’s Electrical Junction Box:
- Position the junction box in line with the mirror defogger’s lead wires, ensuring the wire exit point aligns entirely within the new box’s area.
-
Run Romex Cable from a Nearby Junction Box:
- Typically, connect to the junction box supplying power to the vanity lighting. This configuration allows the defogger to activate automatically with the bathroom lights.
Attach the Defogger to the Mirror
- Clean the back of the mirror thoroughly to ensure proper adhesion.
- Position the defogger on the mirror’s back, aligning it with your markings. Do not remove the protective backing yet.
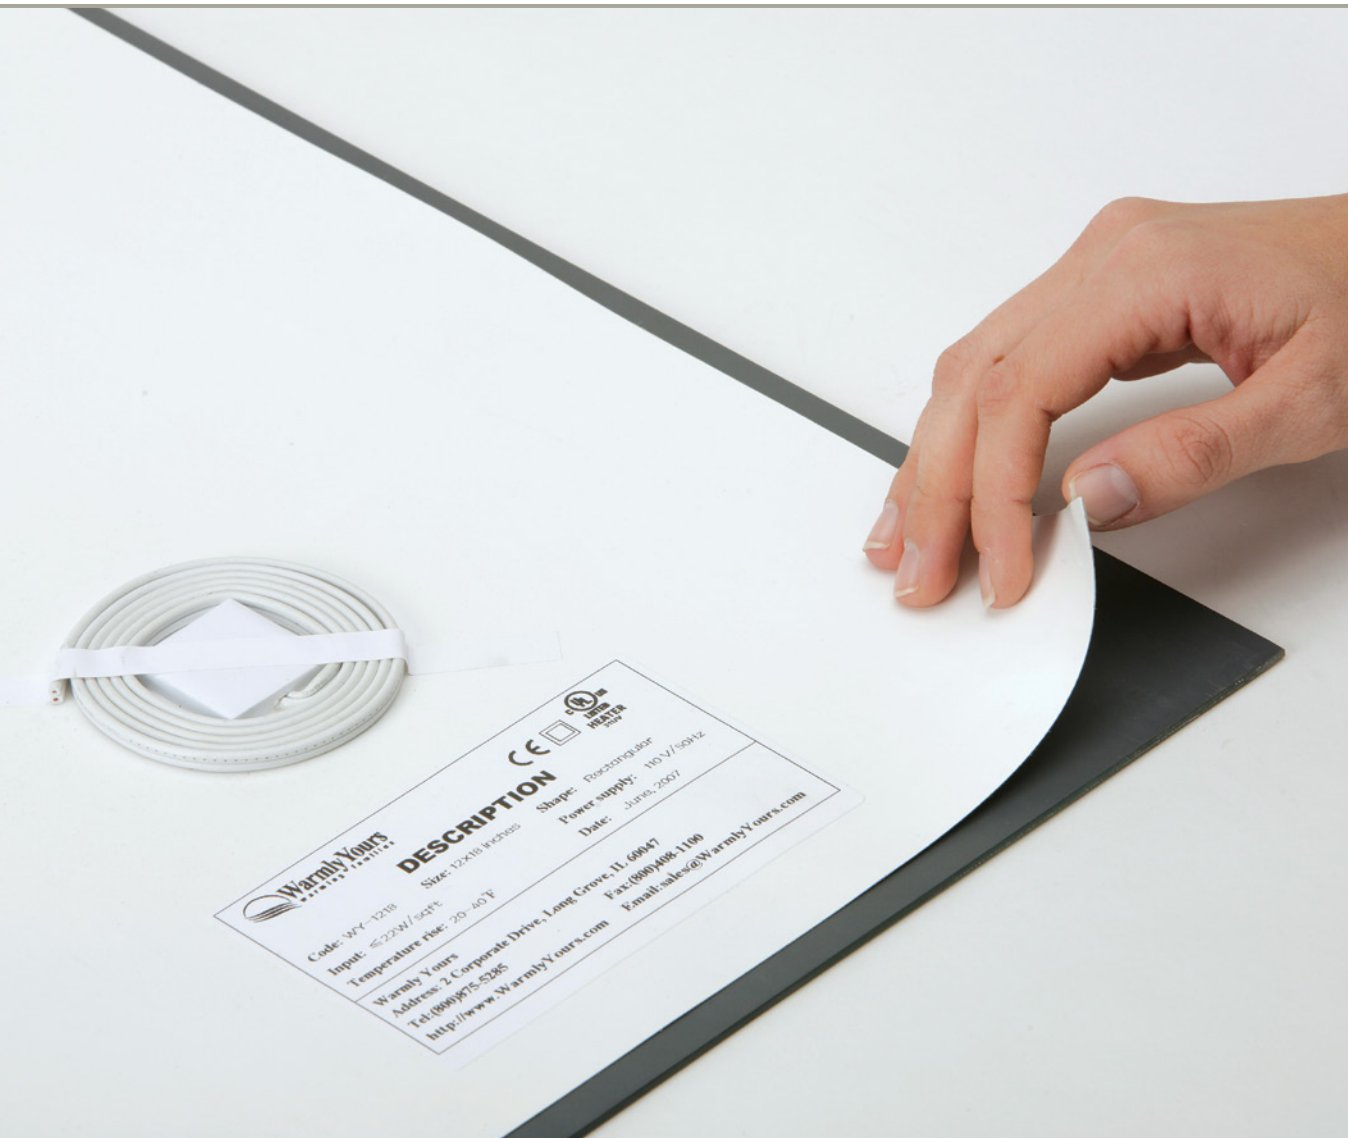
- Peel back about 2” of the protective backing and adhere the exposed section to the mirror. Gradually remove the rest of the backing, pressing the defogger onto the mirror and smoothing out any air bubbles.
- If using adhesive to mount the mirror, apply it only to areas not covered by the defogger.
Important: Mirror defoggers are designed for fixed, wall-mounted mirrors only. Do not attach a mirror defogger to the back of a medicine cabinet door, as the wiring and movement could pose safety hazards.
Electrical Setup: Connecting Your Mirror Defogger
Wiring your mirror defogger correctly is crucial for both performance and safety. Most installations tie the defogger into the same electrical circuit as the bathroom’s vanity light, allowing it to activate automatically when the lights are turned on. Each WarmlyYours mirror defogger includes a 36-inch cold lead, providing ample length to connect the heating element to a nearby electrical junction box. With basic wiring knowledge and a few tools, this part of the installation can be completed smoothly—or with help from a licensed electrician if needed.
With assistance, position the mirror so the defogger’s lead wires can be connected to the Romex cable in the junction box.
-
Safety First:
- Ensure the electrical circuit breaker is shut off at the main panel before proceeding.
-
Secure All Connections and Organize Wiring:
- Ensure all electrical connections are properly secured using wire nuts or approved connectors. Carefully push the excess wire back into the junction box to maintain a clean and safe installation.
-
Follow National Electric Code (NEC)
- All wiring must be in accordance with the NEC and should be performed by a licensed professional who is certified to do electrical wiring.
-
Connection:
- Connect the defogger’s lead wires to the power supply, typically tying it into the bathroom’s lighting circuit. This setup allows the defogger to operate simultaneously with the bathroom lights.
Mounting the Mirror
• Secure Mounting: Once the defogger is attached and wired, mount the mirror onto the wall. Ensure there’s a slight gap between the heating pad and the wall to prevent heat transfer away from the mirror.
• Testing: After installation, turn on the power and test the defogger. The mirror should begin to warm, preventing condensation buildup.
For a detailed visual walkthrough, check out our installation video:
👉 Watch How to Install a Mirror Defogger
By following these simple steps, you can enjoy a consistently clear mirror—even after the steamiest showers.
Related Posts


Like this post? Subscribe for regular updates